使用Nexus部署私有仓库 支持如下及更多
maven
apt
bower
docker
go
npm
pypi
yum
ruby
hosted:本地仓库,通常我们会部署自己的构件到这一类型的仓库。比如公司的第二方库。
安装 1 2 3 mkdir /nexus-data docker run -d -p 8081:8081 --restart always --name nexus -v /nexus-data:/nexus-data sonatype/nexus3 docker exec -t nexus cat /nexus-data/admin.password
建立包存储目录 配置maven仓库
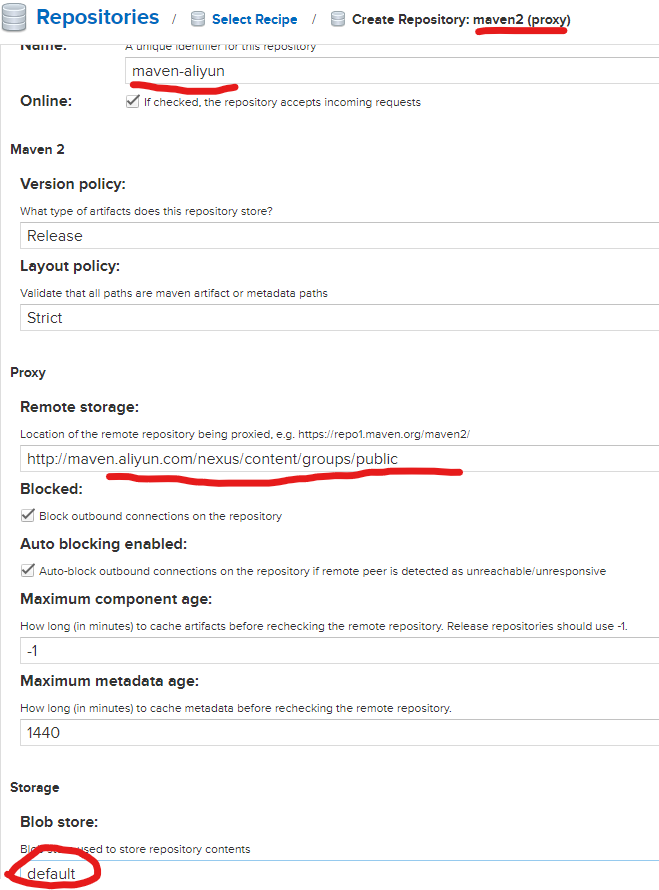
存储默认使用default
创建maven2proxyhttp://maven.aliyun.com/nexus/content/groups/public
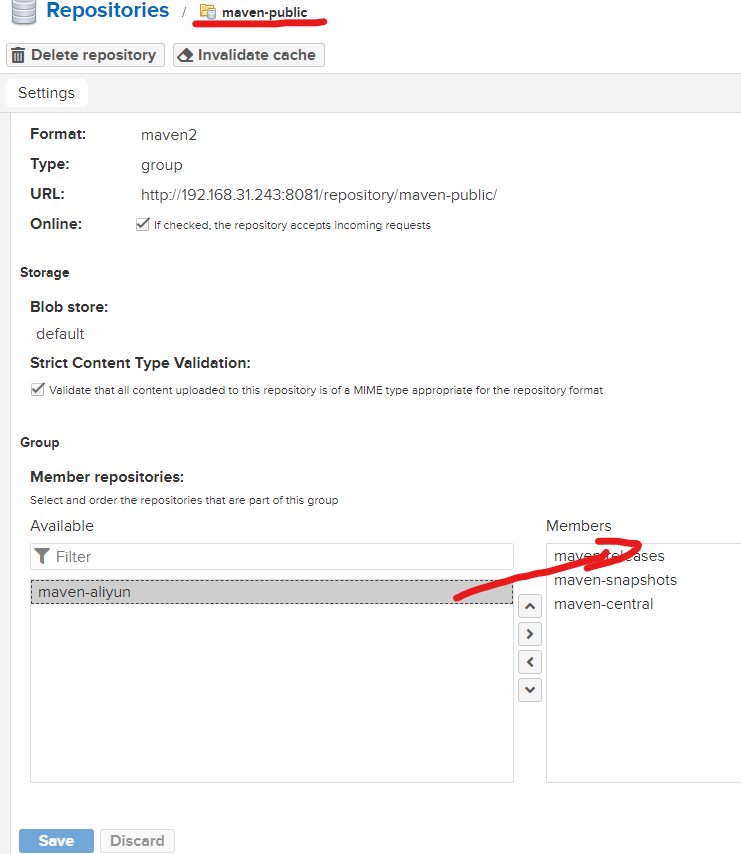
在maven-public添加maven-aliyun
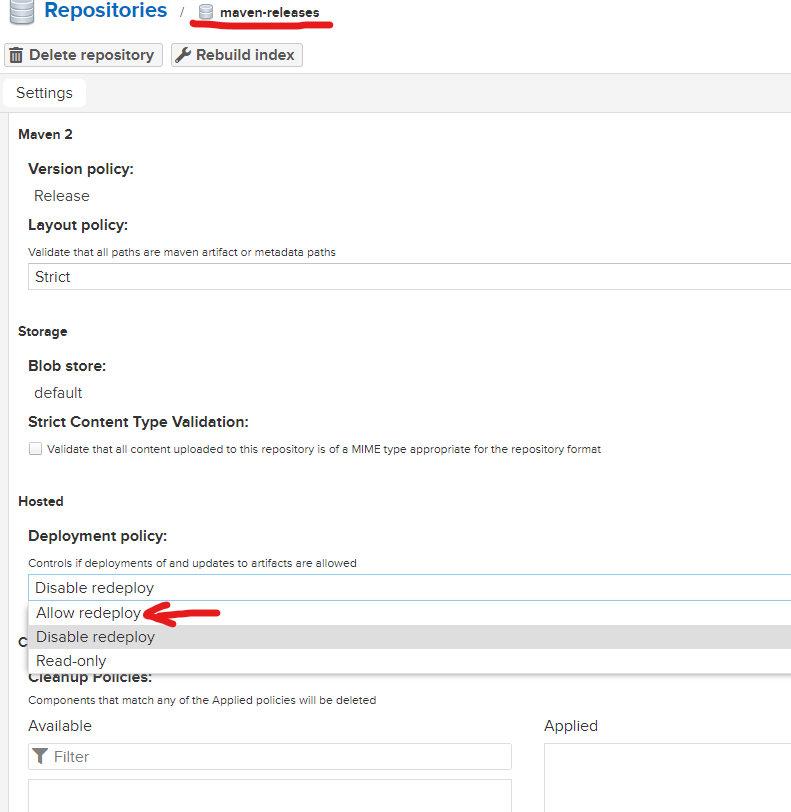
配置 maven-release、maven-snapshots,允许上传Jar包
maven settings文件
yu_ming-ip换成自己的域名或IP,修改server的密码
1 2 3 4 5 6 7 8 9 10 11 12 13 14 15 16 17 18 19 20 21 22 23 24 25 26 27 28 29 30 31 32 33 34 35 36 37 38 39 40 41 42 43 44 45 46 47 48 49 50 51 52 53 54 55 56 57 58 59 60 61 62 63 64 65 66 67 68 69 70 71 72 73 74 75 76 77 78 79 80 81 82 83 84 85 86 87 88 89 90 91 92 93 94 95 96 97 98 99 100 101 102 103 104 105 106 107 108 109 110 111 112 113 114 115 116 117 118 119 120 121 122 123 124 125 126 127 128 129 130 131 132 133 134 135 136 137 138 139 140 141 142 143 144 145 146 147 148 149 150 151 152 153 154 155 156 157 158 159 160 161 <?xml version="1.0" encoding="UTF-8"?> <settings xmlns ="http://maven.apache.org/SETTINGS/1.0.0" xmlns:xsi ="http://www.w3.org/2001/XMLSchema-instance" xsi:schemaLocation ="http://maven.apache.org/SETTINGS/1.0.0 http://maven.apache.org/xsd/settings-1.0.0.xsd" > <pluginGroups > </pluginGroups > <proxies > </proxies > <servers > <server > <id > releases</id > <username > admin</username > <password > password</password > </server > <server > <id > snapshots</id > <username > admin</username > <password > password</password > </server > </servers > <mirrors > <mirror > <id > nexus</id > <mirrorOf > *</mirrorOf > <name > admin</name > <url > http://yu_ming-ip:8081/repository/maven-public</url > </mirror > </mirrors > <profiles > <profile > <id > nexus</id > <repositories > <repository > <id > central</id > <url > http://yu_ming-ip:8081/repository/maven-public</url > <releases > <enabled > true</enabled > </releases > <snapshots > <enabled > true</enabled > </snapshots > </repository > <repository > <id > maven-releases</id > <url > http://yu_ming-ip:8081/repository/maven-releases</url > <releases > <enabled > true</enabled > </releases > <snapshots > <enabled > true</enabled > </snapshots > </repository > <repository > <id > maven-snapshots</id > <url > http://yu_ming-ip:8081/repository/maven-snapshots</url > <releases > <enabled > true</enabled > </releases > <snapshots > <enabled > true</enabled > </snapshots > </repository > </repositories > <pluginRepositories > <pluginRepository > <id > public</id > <name > Public Repositories</name > <url > http://yu_ming-ip:8081/repository/maven-public</url > </pluginRepository > </pluginRepositories > </profile > </profiles > <activeProfiles > <activeProfile > nexus</activeProfile > </activeProfiles > </settings >
发布项目到nexus的pom.xml配置
在settings.xml中配置权限,其中id要与pom文件中的id一致
1 2 3 4 5 6 7 8 9 10 11 12 <distributionManagement > <repository > <id > releases</id > <name > Releases</name > <url > http://{yu_ming-ip}/repository/maven-releases</url > </repository > <snapshotRepository > <id > snapshot</id > <name > Snapshot</name > <url > http://{yu_ming-ip}/repository/maven-snapshots</url > </snapshotRepository > </distributionManagement >
使用命令发布项目
在pom.xml指定nexus
1 2 3 4 5 6 7 8 9 10 11 12 13 <repositories > <repository > <id > nexus</id > <name > nexus</name > <url > http://yu_ming-ip:8081/nexus/content/groups/public/</url > <releases > <enabled > true</enabled > </releases > <snapshots > <enabled > true</enabled > </snapshots > </repository > </repositories >
在项目的pom.xml文件中指定插件仓库
1 2 3 4 5 6 7 8 9 10 11 12 13 <pluginRepositories > <pluginRepository > <id > nexus</id > <name > nexus</name > <url > http://yu_ming-ip:8081/nexus/content/groups/public/</url > <releases > <enabled > true</enabled > </releases > <snapshots > <enabled > true</enabled > </snapshots > </pluginRepository > </pluginRepositories >
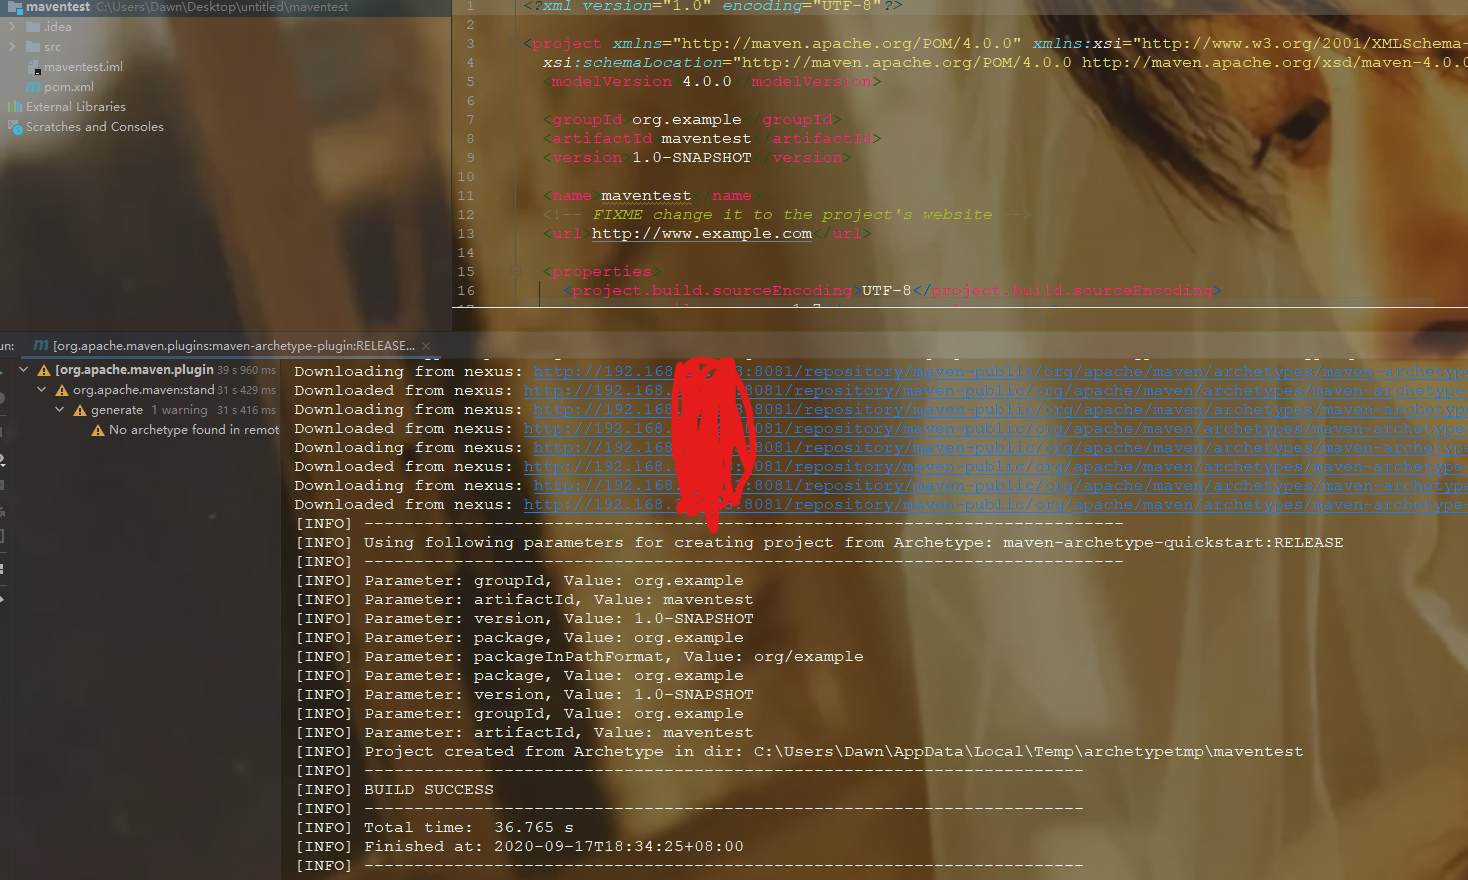
测试
离线包上传
配置apt仓库
创建ubuntu blob stores
创建仓库选择apt(hosted)
键入名称ubuntu
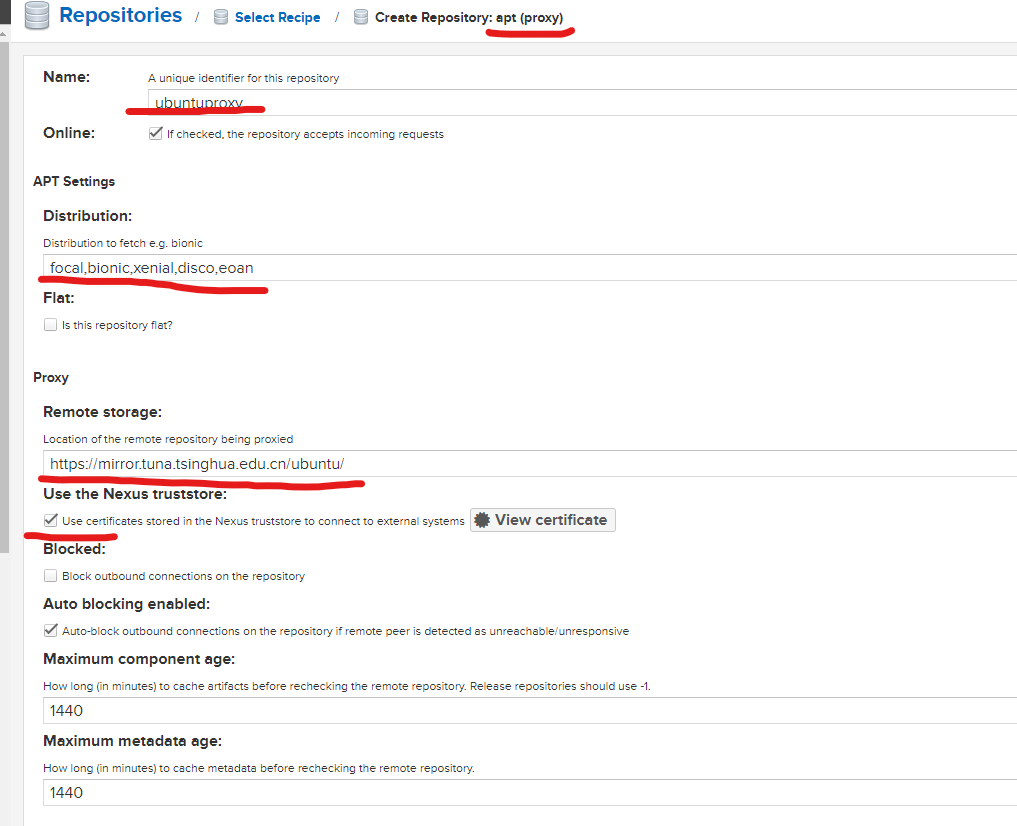
分支Distribution 输入:focal,bionic,xenial,disco,eoan
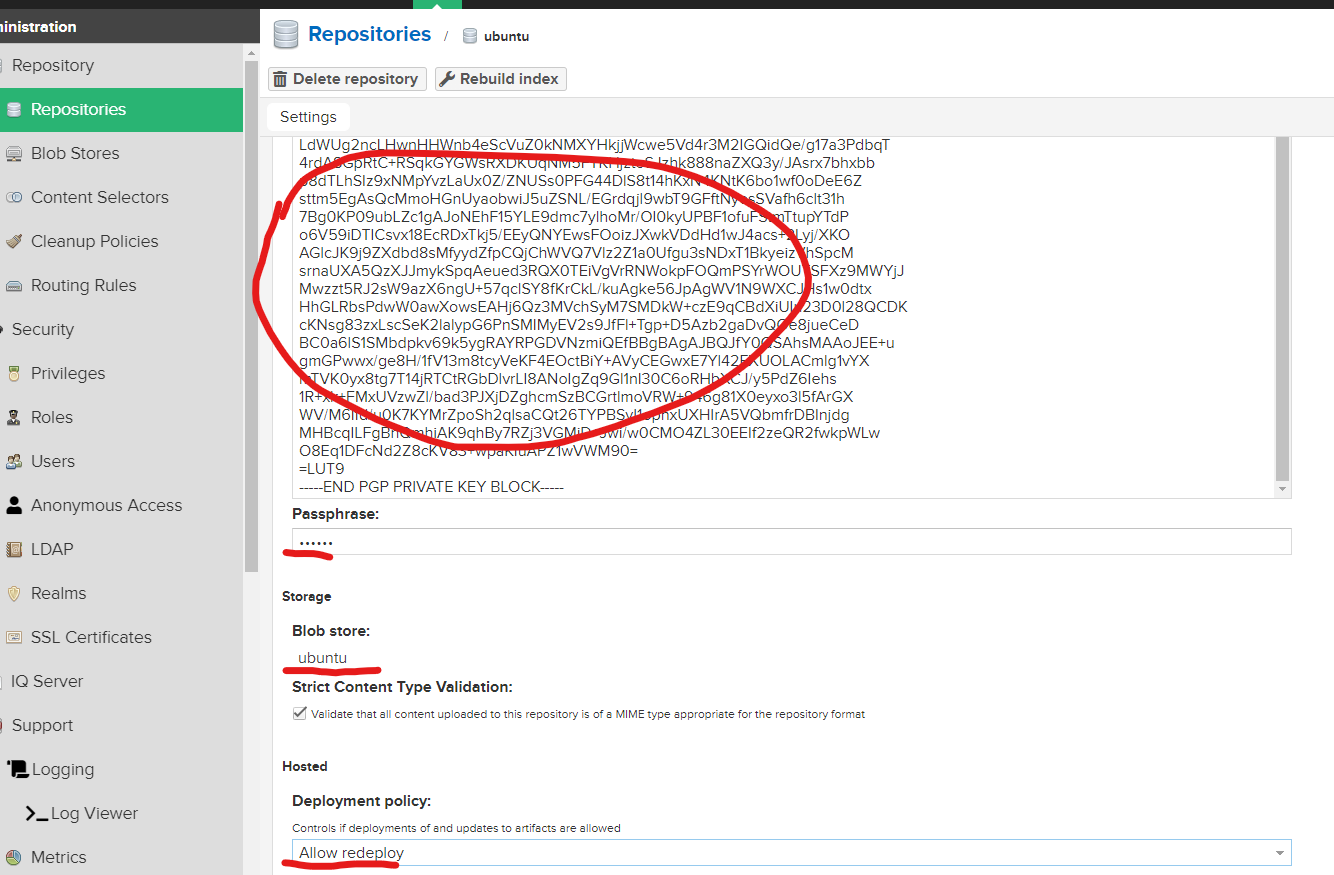
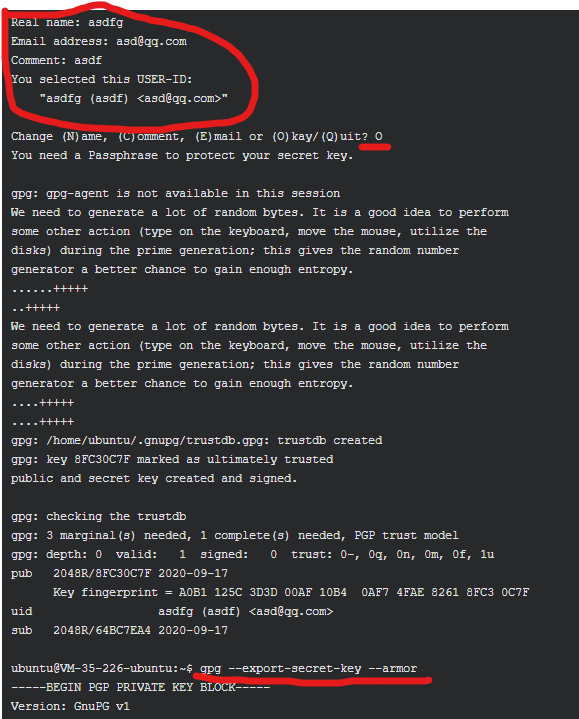
signing key: 通过gpg --export-secret-key --armor 导出,并输入密码apt install rng-tools && gpg --gen-key ,一直回车再按提示输入相关信息
https://mirror.tuna.tsinghua.edu.cn/ubuntu/
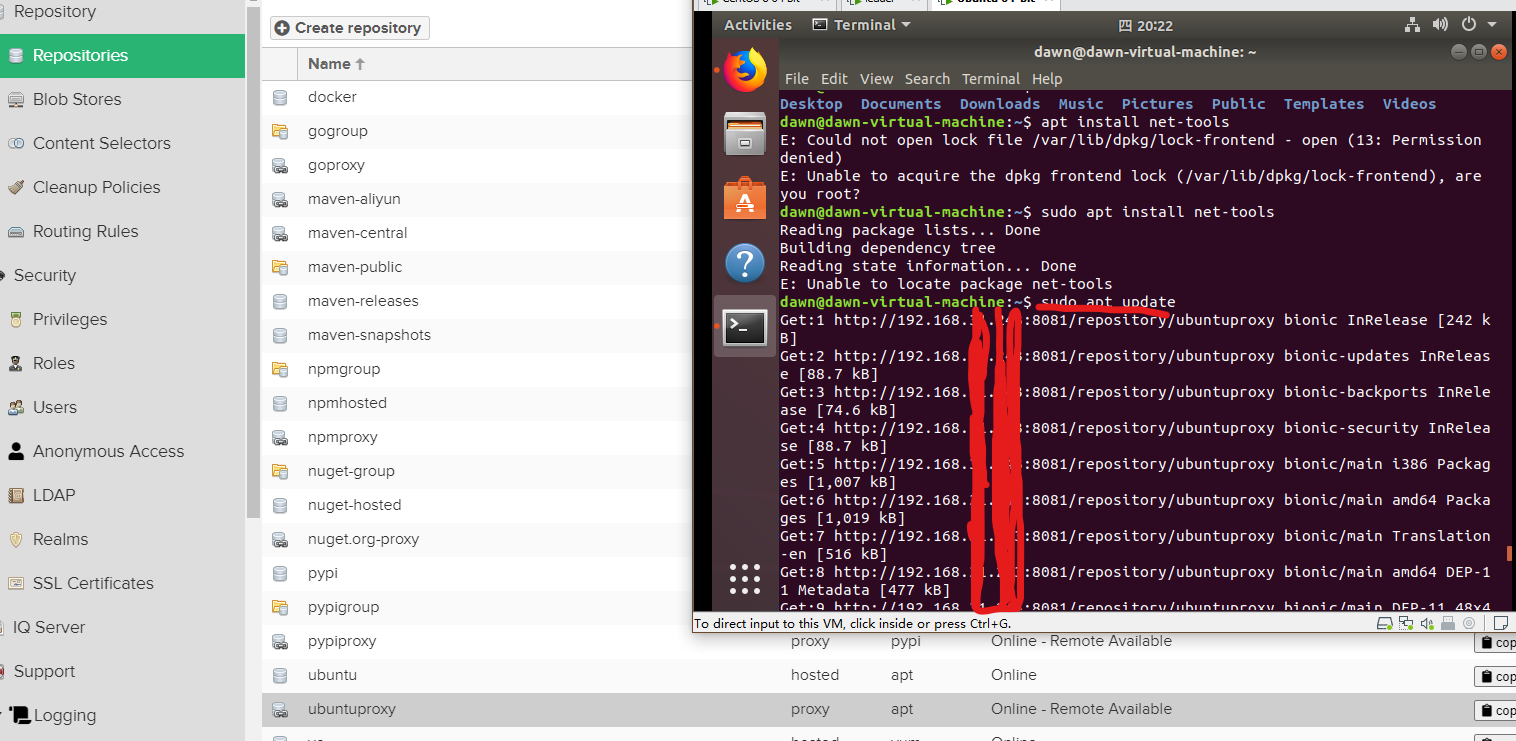
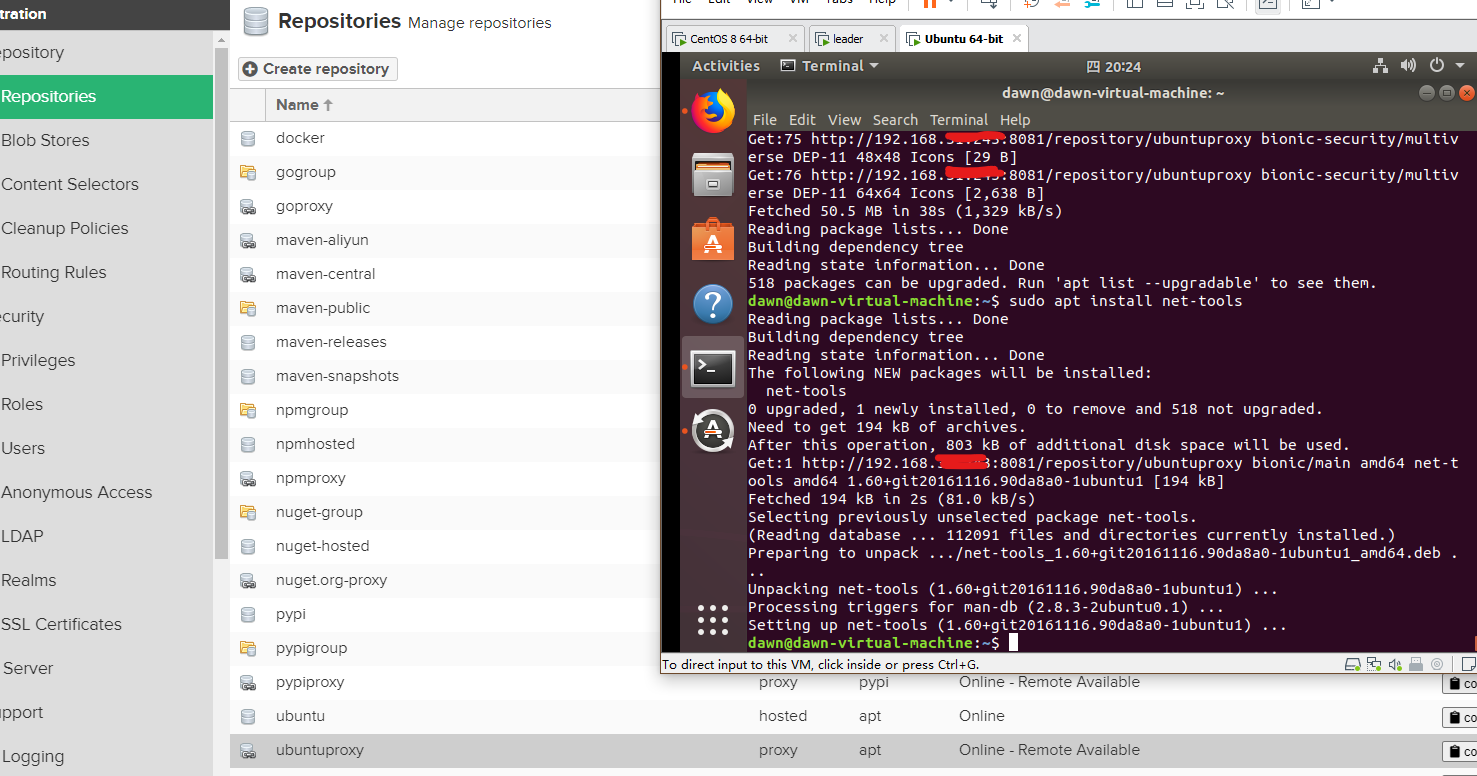
Ubuntu的软件源配置文件是 /etc/apt/sources.list。将系统自带的该文件做个备份,将该文件替换为下面内容:
1 2 3 4 5 deb http://yu_ming-ip:8081/repository/ubuntuproxy/ bionic main restricted universe multiverse deb http://yu_ming-ip:8081/repository/ubuntuproxy/ bionic-updates main restricted universe multiverse deb http://yu_ming-ip:8081/repository/ubuntuproxy/ bionic-backports main restricted universe multiverse deb http://yu_ming-ip:8081/repository/ubuntuproxy/ bionic-security main restricted universe multiverse
测试
配置docker仓库 配置go仓库
创建go blob stores
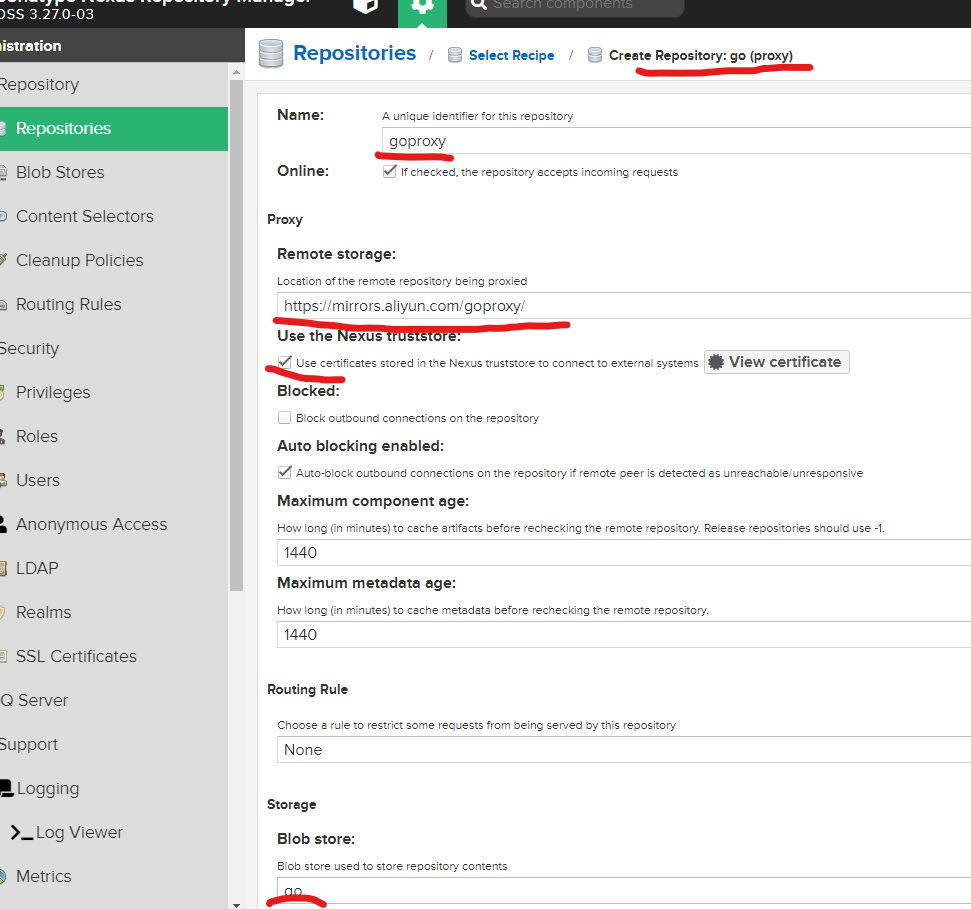
创建仓库选择go(proxy)
键入名称
输入远程存储地址 https://mirrors.aliyun.com/goproxy/ 勾选Use certificates stored
选择之前创建的blob stores
创建仓库选择go(group)
键入名称
选择创建的go blob stores
在member选项选择刚刚创建好的proxy
修改环境变量
1 2 3 4 5 6 7 8 9 go env -w GO111MODULE=on go env -w GOPROXY=http://yu_ming-ip:8081/repository/gogroup/ set GO111MODULE=onexport GO111MODULE=onexport GOPROXY=http://yu_ming-ip:8081/repository/gogroup/
测试go get -u github.com/golang/sys
配置npm仓库
创建blob stores
创建仓库选择npm(hosted)
键入名称
选择刚刚创建的blob stores
创建仓库选择npm(proxy)
键入名称
输入远程存储地址 https://registry.npm.taobao.org 勾选Use certificates stored
选择之前创建的blob stores
创建仓库选择npm(group)
键入名称
选择刚刚创建的blob stores
在member选项选择刚刚创建好的hosted和proxy
1
2
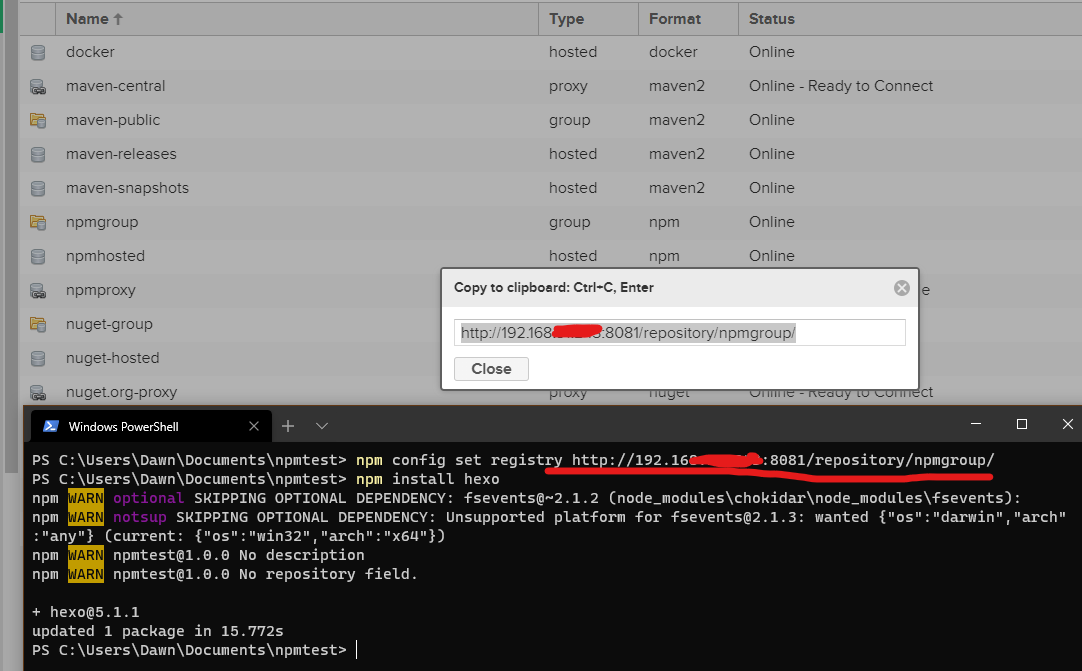
npm config get registry npm config set registry http://yu_ming-ip:8081/repository/npmgroup/
配置pypi仓库
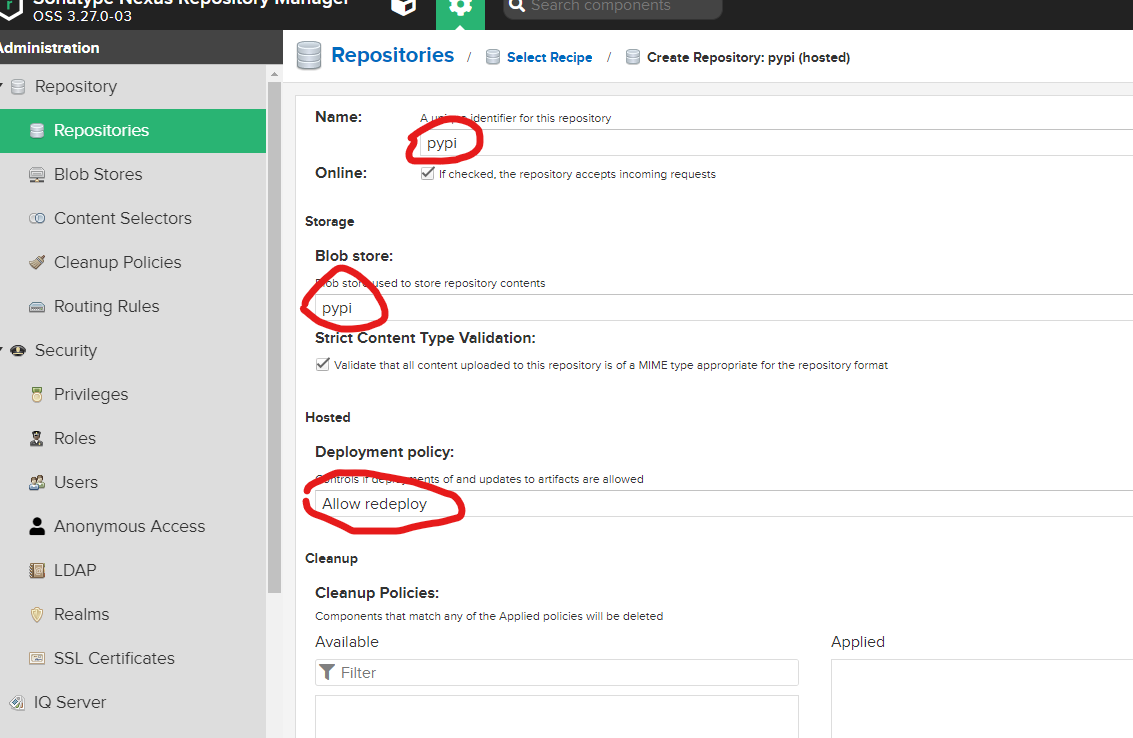
创建pypi blob stores
创建pypihosted
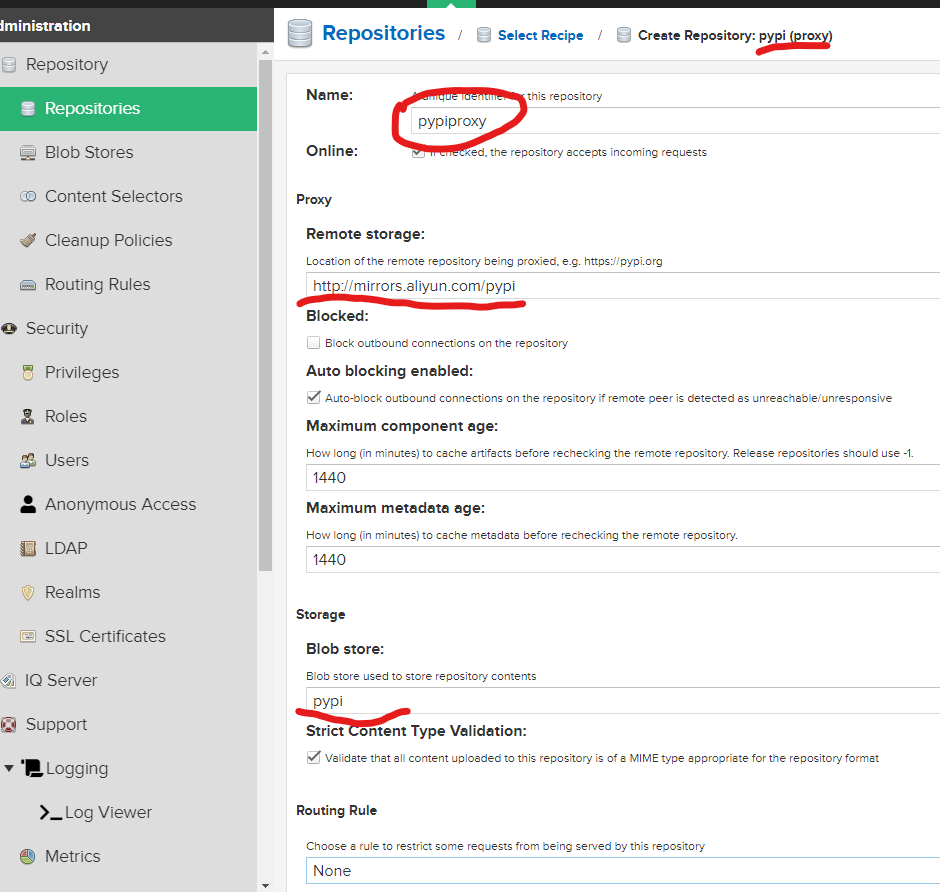
创建pypiproxyhttp://mirrors.aliyun.com/pypi
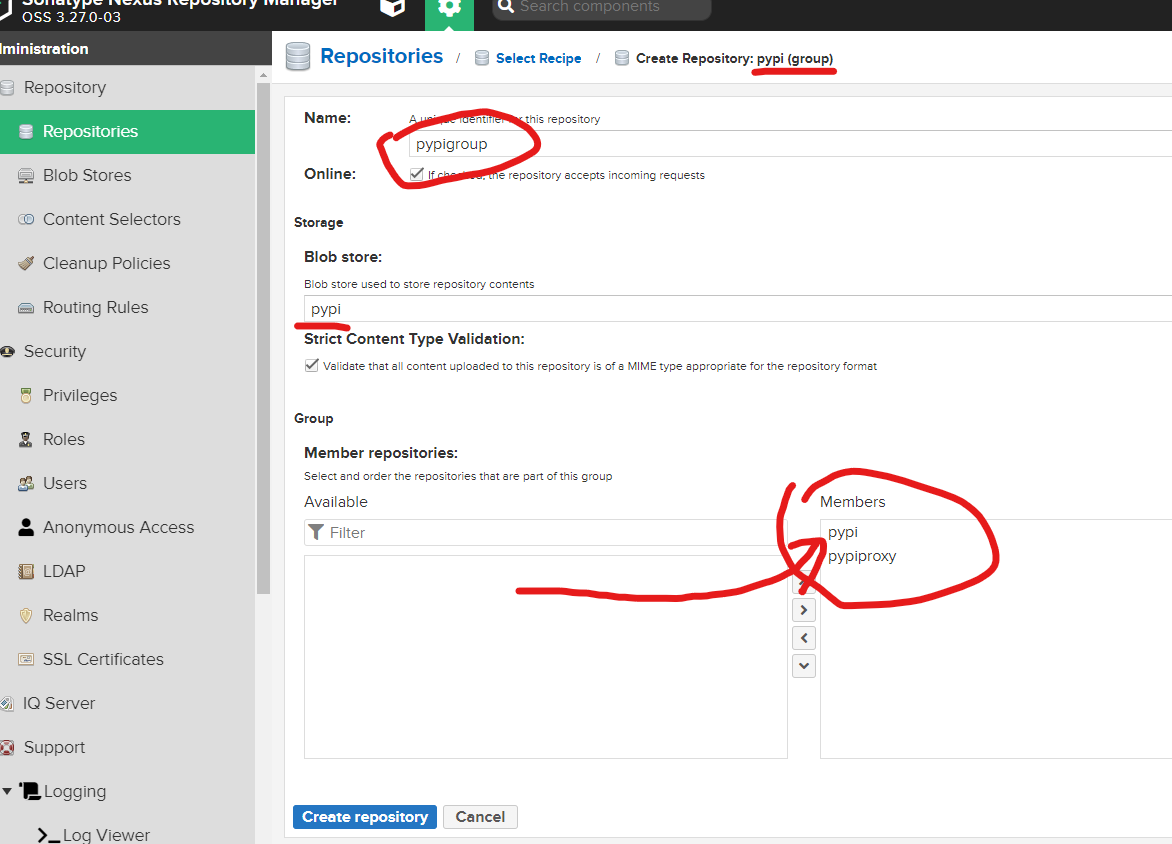
创建pypigroup
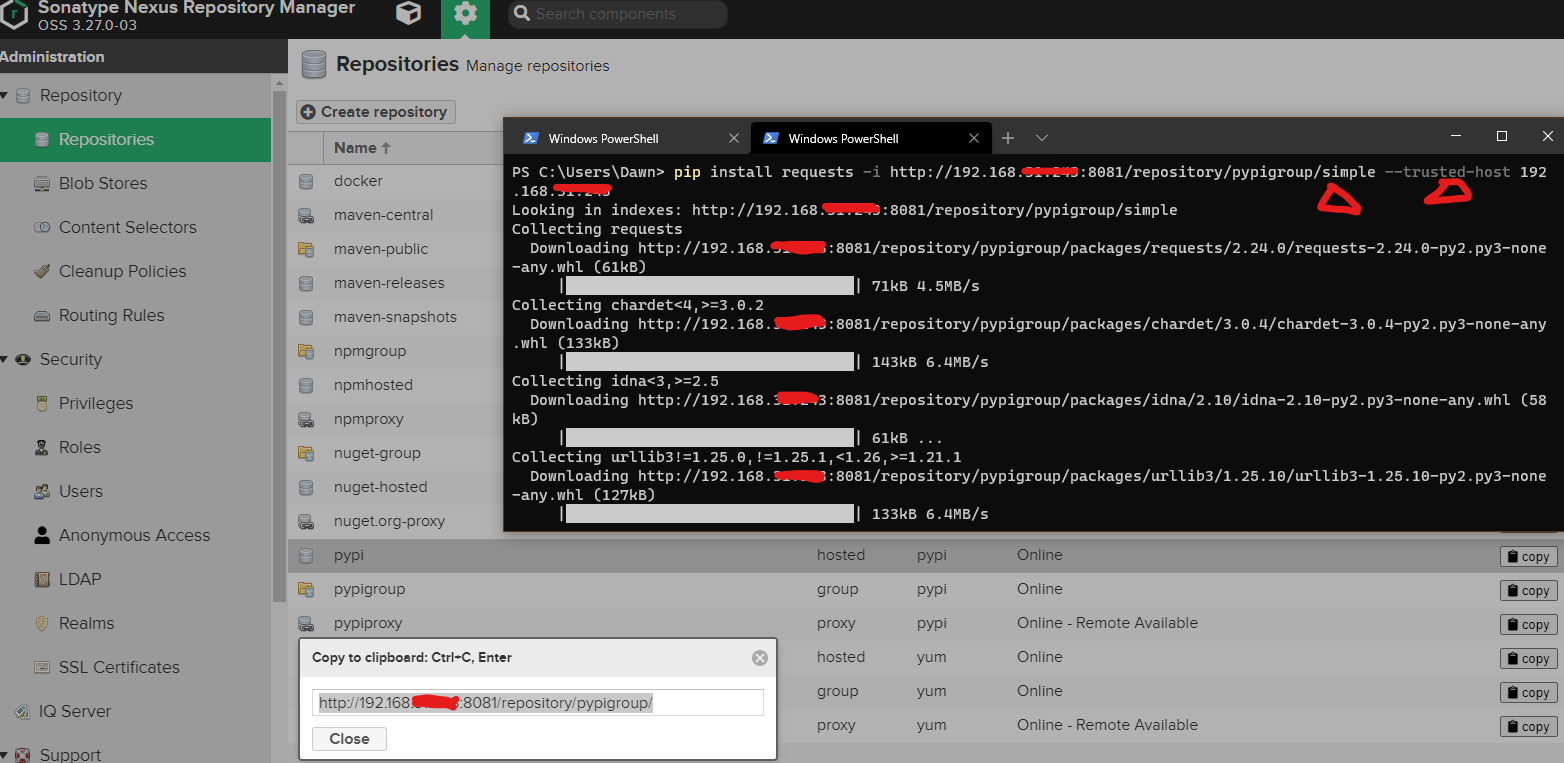
测试
1 pip install requests -i http://yu_ming-ip:8081/repository/pypigroup/simple --trusted-host yu_ming-ip
配置yum仓库
创建yum存储空间
填写对应信息
创建yumhosted
创建yumproxyhttps://mirrors.aliyun.com/centos
创建yumgroup
在 etc/yum.repos.d/ 备份 *.repo 文件并新建 nexus.repo 填如下内容
1
2
3
4
5
[nexus] name=NexusYum baseurl=http://yu_ming-ip:8081/repository/yumgroup/$releasever/os/$basearch/ enabled=1 gpgcheck=0
1
2
yum clean all yum makecache
内网全量同步


